Rest day creation is based on company needs. Refer to the guidelines below for creating rest days: (When the default rest days do not meet company requirements, such as fixed rest days on weekdays or more than two rest days per week, creating custom rest days will be necessary).
In Dashboard, click on RESTDAY.
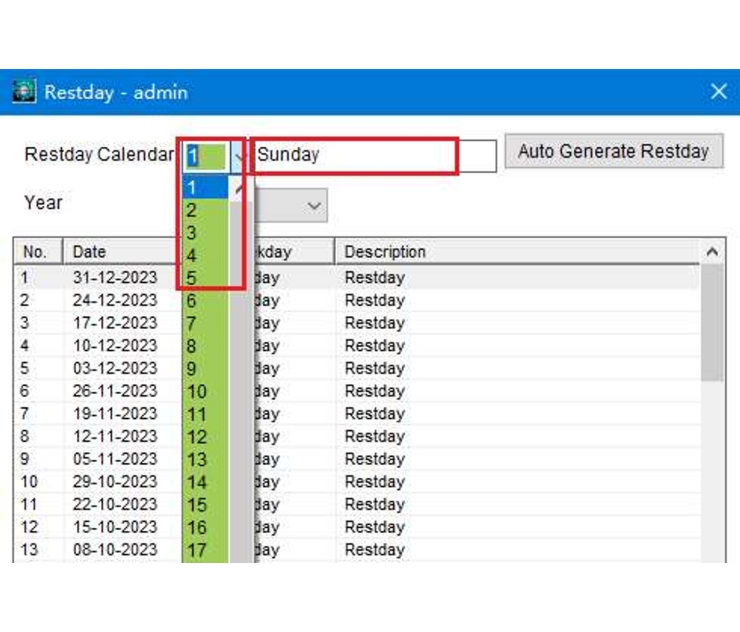
There are 3 default Restday Calendars as follows:
1: Rest on Sunday
2: Rest on Saturday and Sunday
3: Rest on Friday and Sunday
For Restday Calendar numbers 4 to 99, you can set your preferred rest days if they differ from the default schedules.
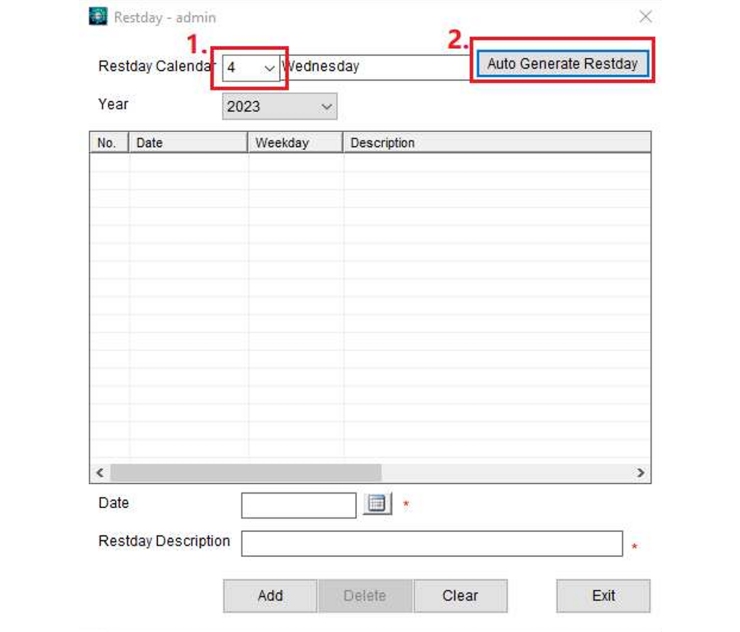
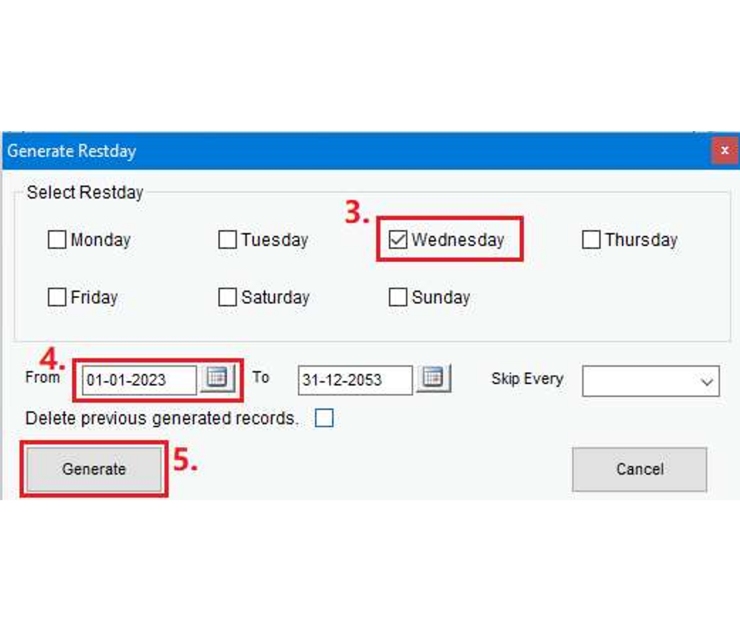
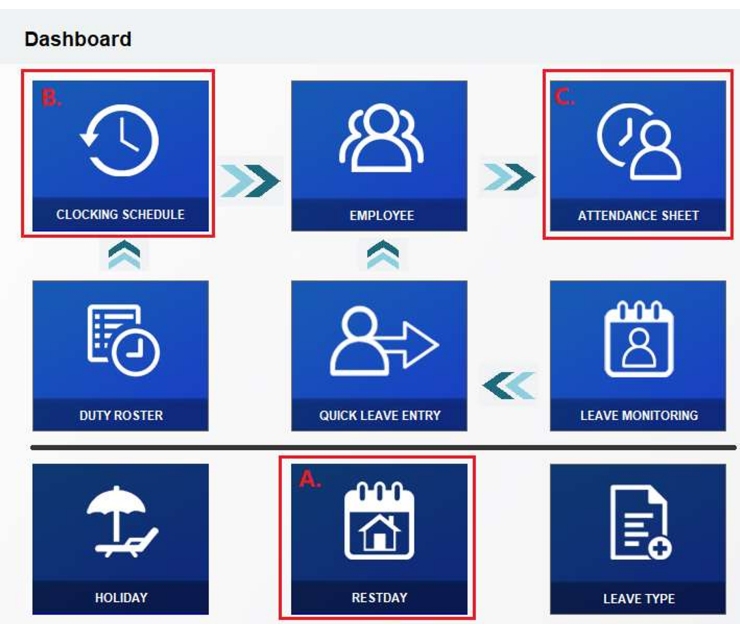
Continue by proceeding to the Dashboard -> CLOCKING SCHEDULE.
Now, change or assign the newly created Restday Calendar to the desired Clocking Schedule.
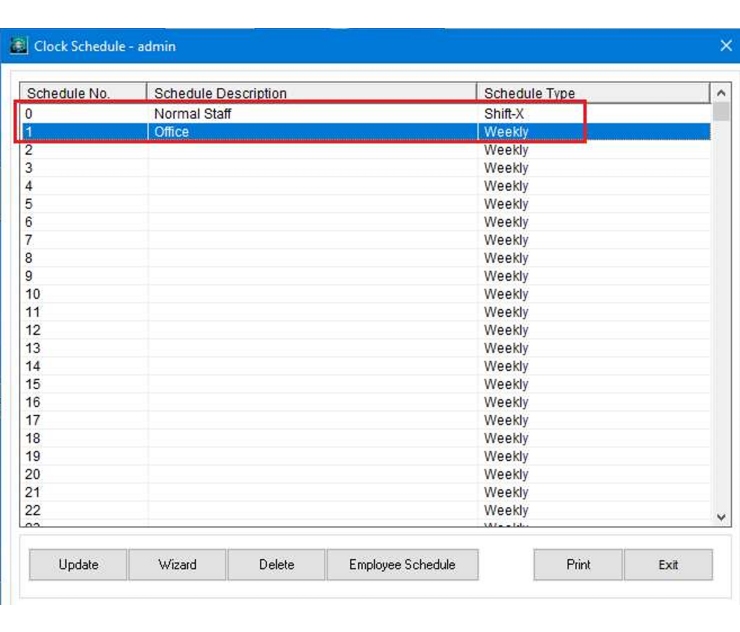
Double click the desired Clocking Schedule. Eg, Office.
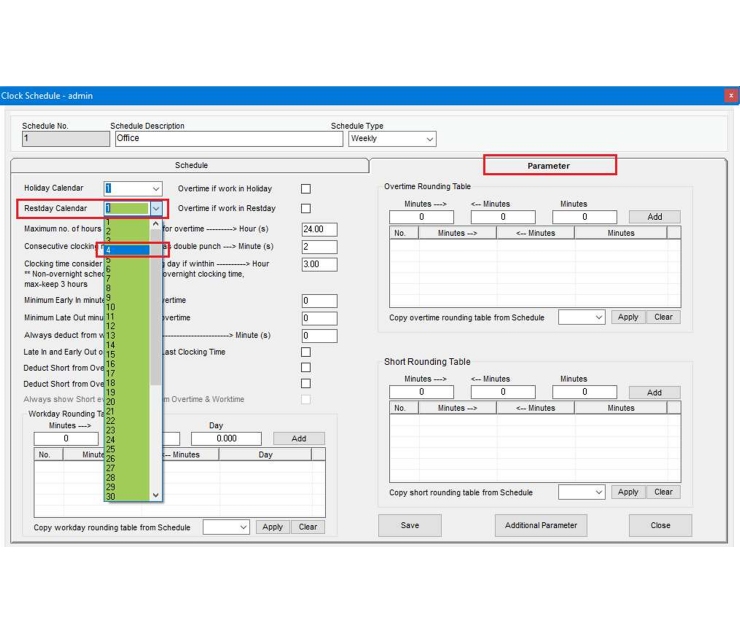
Click on "Parameter" and select the preset Restday Calendar for this Clocking Schedule.
Based on company needs, you can check "Overtime if work in Restday" if the company will pay overtime for work done on a rest day. Otherwise, leave the option unchecked.
Click "Save" when finished.

Continue by proceeding to the Dashboard -> ATTENDANCE SHEET.
Now, generate the Attendance Sheet for the employees using the Clocking Schedule that has been newly assigned with the Restday Calendar.
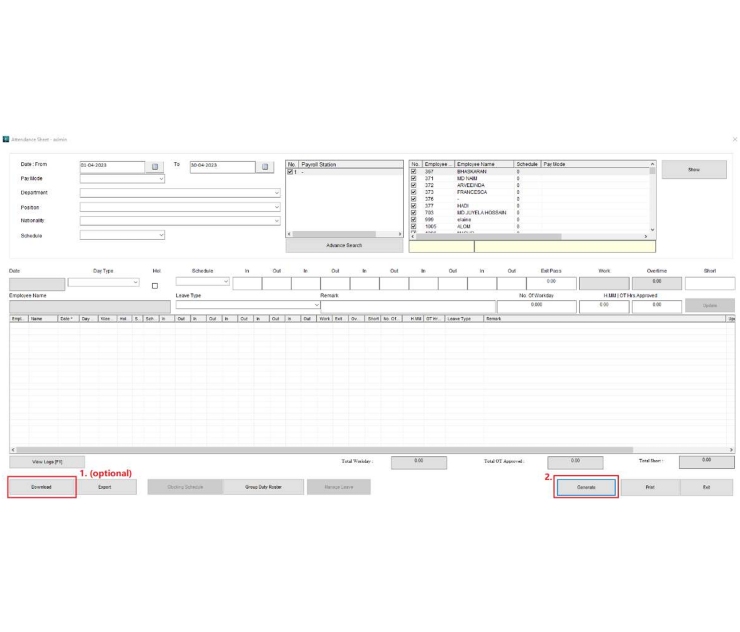
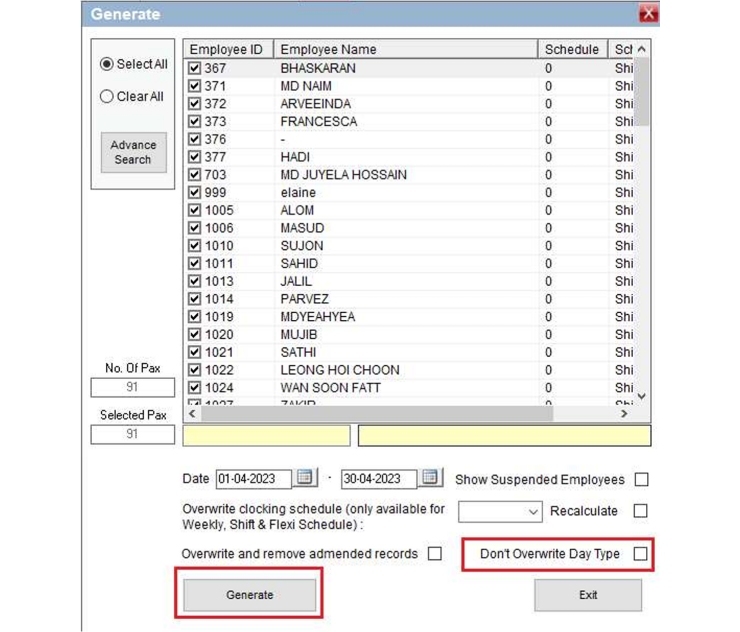
Note: Do not proceed if there is any manual data input on the Attendance Sheet, such as Annual Leave, Sick Leave, etc. This will remove the day type in the selected period.
If you have to proceed with this, you will have to re-enter the Annual Leave, Sick Leave, etc., after the newly generated Attendance Sheet.
